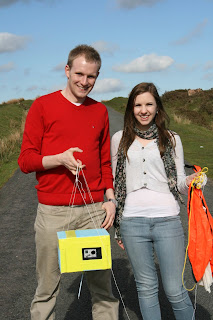
Last Saturday we were invited to present at the AMSAT-UK Colloquium in Guildford. We had a fantastic day, starting out with a brilliant tour around the Surrey Space Centre. Who knew the UK was so advanced in space satellite technology!? Very impressive stuff - wish I lived closer (any job offers welcome ;)).
AMSAT-UK, for those who aren't familiar, is the UK arm of the worldwide AMSAT organisation who specialise in radio amateur satellites. The great group of guys (and ladies) there use their radio knowledge to either build satellites that get launched with other rockets and payloads, or use their equipment at home to track them.
We were asked if we would like to present at the Colloquium and after some initial worries, we decided to go for it! We knew it would be a tight schedule in terms of preparation, because of the house move - but it was such a amazing opportunity to meet experts and dedicated specialists from across the world.
We were so glad when the actual presentation was well received and thanks to all those at AMSAT who were very kind and welcoming. The presentation was aimed at all audiences so we included as much of a range as we could, covering the basics as well as getting in some project background, coding, payload construction, tracking information and an insight into recovery (inc. the sheep from STRATODEAN Two)! It was quite the task trying to pitch it right but hopefully there's something to interest everyone.
The weekend included a full programme of presentations and talks by representatives of the British Interplanetary Society, UK Space Agency and European Space Agency, to name but a few. Please find information and the videos provided by the British Amateur Television Club (BATC) here.
Tuesday, 23 July 2013
Thursday, 18 July 2013
STRATODEAN Update
Admittedly all has been slightly quiet on the blog front but we don't want you thinking we've been resting on our laurels! Instead we've been busy planning STRATODEAN Three, so here's a sneaky peak of the custom circuit board we've designed and had made.
Early aims/ideas for STRATODEAN Three include a upwards facing camera to capture the moment of balloon burst and the inclusion of rotating servos.

A lot of time has also been taken up with a STRATODEAN HQ move. That's right, we have a new abode complete with faster internet - yippee! On the right is a photo of Mark putting up some curtains to act as proof of the move.
We're also very excited to be speaking at this weekend's AMSAT-UK International Space Colloquium, further information can be found here. To anyone attending the talk but visiting our blog ahead of the day:
"Hello! Hope you find our project interesting but no watching our STRATODEAN Two video as we'll be showing it on Saturday!"
Early aims/ideas for STRATODEAN Three include a upwards facing camera to capture the moment of balloon burst and the inclusion of rotating servos.

A lot of time has also been taken up with a STRATODEAN HQ move. That's right, we have a new abode complete with faster internet - yippee! On the right is a photo of Mark putting up some curtains to act as proof of the move.
We're also very excited to be speaking at this weekend's AMSAT-UK International Space Colloquium, further information can be found here. To anyone attending the talk but visiting our blog ahead of the day:
"Hello! Hope you find our project interesting but no watching our STRATODEAN Two video as we'll be showing it on Saturday!"
Sunday, 26 May 2013
STRATODEAN Two
Here's our video of STRATODEAN Two - don't forget to view in HD and that you can pause the video if you see something interesting! The photos are at the bottom of this page.
Saturday afternoon saw the launch of our second high altitude balloon. There was less build up for this one and to be frank we weren't initially planning on launching again so quickly, but an opportunity presented itself and we just decided to go for it.
We decided so quickly, we almost surprised ourselves. There were a few factors which played a part:
- we were still in possession of a half full jumbo tank of helium just begging to be used
- the nice man at the CAA had given us approval and it would be rude not to use it
- that GoPro video camera lens fogging incident first time round was rather annoying and we still felt like we could get better images and video
- the launch predictor was showing an unusual flight path doubling over our hometown and then making its way over the picturesque Brecon Beacons
- family members who were unable to make the first launch wanted a repeat so they could see a bit of the action
 So low and behold, we found ourselves at the local recreational ground once more, ready for launch. You can read a little more about the amendments we made to our payload and tracker here, everything thing else pretty much stayed the same.
Our launch preparations were delayed slightly by a slight tracker hiccup; it was connecting to the GPS and uploading our location correctly but the signal was unreliable, dropping in and out. We didn't want to risk launching without a firm satellite fix so this set us back around 40 minutes.
As you will see, it wasn't exactly clear, blue skies but due to this we actually managed to capture some interesting cloud formations.
 |
| What's this, sitting down on the job?! |
 |
| All systems go! Walking out to launch. |
 |
| Sandwiched between two cloud layers. |
 |
| STRATODEAN Two Flight Path |
We said hello (and swiftly goodbye) to 3G around the Abergavenny area and from that point on only had normal mobile phone signal at intermittent intervals. Our three networks (O2, Vodafone and Virgin) all failed us! Whilst we remained in good contact with the tracker and were consistenly receiving altitude and location data, our lack of 3G meant we just weren't able to decipher these coordinates. This meant having to rely on good old-fashioned map books and calling friends with Wi-Fi back at home. Turns out spelling the names of remote Welsh areas on a crackling phone line is more difficult that you think, two of our favourites were: Coed Aberllechach and Llanddeusant.
Apologies to all for our lack of contact on the UKHAS chat and Twitter - believe us it was very frustrating! While we were struggling for any type of signal, our colleagues in Chase Car Mini had 3G (lucky duckies!) and were quite happily tracking away using their network of choice '3'. Their tracking ability ended when the HAB tracking community lost contact due to the mountains breaking their line-of-sight at approx. 2500 feet. Shortly after the payload had landed, when we miraculously had signal, we managed to rendez-vous with Chase Car Mini and use their 3G to look up our up-to-date GPS coordinates from our SDR receiver. It had landed in a field of sheep, conveniently right next to the road and only two minutes away.
We recovered the payload approx. 15 minutes after landing. As the location was so open and accessible, with better 3G infrastructure we think we would have actually been very close to being able to watch it land! The dream of catching the payload (or more realistically, being hit on the head by it) as it falls from the Earth's atmosphere lives on...
 |
| Locals are unimpressed with our parachute. |
 |
| Team high five - Cassie putting in a little more effort than Mark. |
We have picked out some of our favourite photos from the on-board still camera below. Be sure to check out more in our album at the bottom of the page. As well as the Earth, there's some nice pics of the Brecon Beacons, a reservoir and even some sheep. Yippee. We were a lot happier with these images and with the side-mounted camera picking up the curvature of the Earth.
 |
| Camera pointing south, the two bodies of water are the Bristol Channel and English Channel. |
 |
| Nice sunny day up here! Our sensors showed that the temperature dropped to its lowest -31C at 11000m and then rose again to 6C at time of burst. |
 |
| Aeroplane trails crisscrossing into the clouds. This area is the primary flight path from Heathrow to the USA. |
 |
| That little white dot is the Moon. |
As mentioned above, one of the driving factors for a quick second launch was the misting up of our GoPro camera first time round. The below pictures are a clear example of the difference made by removing the plastic protection over the lens, which prevented any condensation forming. We were much happier with the improved colour definition and image quality.
 |
| Still from our STRATODEAN One GoPro Video. |
 |
| Still from our STRATODEAN Two GoPro Video. |
What we learnt this time round:
- For all future launches, '3' is the dongle network of choice
- Clouds are interesting
 |
| No, the cameras aren't all his. Canon, if you're reading this - please sponsor us with a super duper lens. Cheers. |
Friday, 17 May 2013
Our second launch tomorrow!
A very quick post today confirming we are preparing for a launch tomorrow afternoon - although as always, weather permitting!
As a quick summary we've:
As a quick summary we've:
- Added two temperature sensors to monitor the changes both inside and outside the payload.
- Installed the still camera (previously used pointing downwards) into a side position for more horizon photos.
- Removed the lens cover from the GoPro camera so as to hopefully avoid the fogging as seen on the first video.
This launch follows quick on the heels of our first as we are still within our balloon helium hire and are able to use our original spare balloon. The weather predictions have been prohibitive until very recently so we want to pounce while the opportunity is there.
Any assistance with tracking would be much appreciated by fellow HABers. Tracking details can be found on the UKHAS site. It's looking like a potentially interesting recovery in the Brecon Beacons (hiking boots at the ready!).
Tuesday, 7 May 2013
STRATODEAN One Follow-up and Future Plans
As promised, here are some of the stats and data we've gathered from STRATODEAN One. We launched on Sunday 21st April at 10:14am from our local rec in Coleford.
We listed our flight on the UKHAS Google Group in the few weeks prior to launch so we had lots of people willing to help track. See below for a break down - thanks to all those mentioned!
We were forced to stop our own in-car tracking to save the laptop battery (in-car changer blew a fuse!) so your help was essential for us to keep an eye on the balloon trajectory and predicted landing site.
Some of the most positive feedback from our flight was that the signal did not drift off frequency. In real terms this means that our radio transmitter kept very close to the advertised 434.650MHz and was not adversely affected by temperature. This also meant that tracking was easier as radios did not have to continually be retuned. We received a nice email from new 'HABer' Martin Rigby who was kind enough to show us a screen shot of the signal as received by his radio in Penrith, Cumbria. You can see that the RTTY lines are fairly straight.
We also had an email from fellow HABer Geoff Mather who was able to create this interactive flight movie in Google Earth based on the telemetry that we had been transmitting. Thank you Geoff!
The raw telemetry that was saved onto the SD card from the transmitter can be seen here.
Since the launch we have put things on the back burner for a week, just to reflect on what we have achieved and to think about a few other (non-space!) ideas. However, it's now time to start resetting ourselves and the project and working out what we can do better for STRATODEAN Two!
In our second launch we'd like to do a few things differently. The first launch was a success but there are some improvements to be made. Firstly we aren't entirely happy with our video quality when the payload reached the stratosphere. We included the GoPro anti-fog inserts thinking that this would help us avoid the misting in our videos, however we now know this caused the exact opposite to happen. The waterproof case let air out but did not let air in, so a vacuum formed inside. As we all remember from our science lessons(!), water boils at a much lower temperature inside a vacuum, so inside our case, the moisture that had been collected by the anti-fog inserts started to boil and then condensed on to the coldest part of the case - the lens cover pointing out into space! To remedy this we are simply going to fly without inserts or a lens cover and have holes in the case so that no vacuum can form.
We had no idea from the first launch how hot/cold it was up there, so another thing that we have acquired are temperature sensors that we can wire into our flight tracker so that it will record these values for us.
Finally, something we are trying to research for next time is adding time, velocity and altitude data to our flight videos - currently a work in progress trying to find the best software. We had people comment on the video 'how high are we now' at certain points, so it would be nice to have a little 'Head-Up Display' on the video to display this data.
We have applied for CAA approval and extended our helium rental so it's just a case of completing our upgrades and waiting for good weather!
We listed our flight on the UKHAS Google Group in the few weeks prior to launch so we had lots of people willing to help track. See below for a break down - thanks to all those mentioned!
| People tracking our payload |
We were forced to stop our own in-car tracking to save the laptop battery (in-car changer blew a fuse!) so your help was essential for us to keep an eye on the balloon trajectory and predicted landing site.
 |
| Signal being received |
We also had an email from fellow HABer Geoff Mather who was able to create this interactive flight movie in Google Earth based on the telemetry that we had been transmitting. Thank you Geoff!
The raw telemetry that was saved onto the SD card from the transmitter can be seen here.
Since the launch we have put things on the back burner for a week, just to reflect on what we have achieved and to think about a few other (non-space!) ideas. However, it's now time to start resetting ourselves and the project and working out what we can do better for STRATODEAN Two!
In our second launch we'd like to do a few things differently. The first launch was a success but there are some improvements to be made. Firstly we aren't entirely happy with our video quality when the payload reached the stratosphere. We included the GoPro anti-fog inserts thinking that this would help us avoid the misting in our videos, however we now know this caused the exact opposite to happen. The waterproof case let air out but did not let air in, so a vacuum formed inside. As we all remember from our science lessons(!), water boils at a much lower temperature inside a vacuum, so inside our case, the moisture that had been collected by the anti-fog inserts started to boil and then condensed on to the coldest part of the case - the lens cover pointing out into space! To remedy this we are simply going to fly without inserts or a lens cover and have holes in the case so that no vacuum can form.
We had no idea from the first launch how hot/cold it was up there, so another thing that we have acquired are temperature sensors that we can wire into our flight tracker so that it will record these values for us.
Finally, something we are trying to research for next time is adding time, velocity and altitude data to our flight videos - currently a work in progress trying to find the best software. We had people comment on the video 'how high are we now' at certain points, so it would be nice to have a little 'Head-Up Display' on the video to display this data.
We have applied for CAA approval and extended our helium rental so it's just a case of completing our upgrades and waiting for good weather!
Monday, 29 April 2013
STRATODEAN One
Here's our video of STRATODEAN One - don't forget to view in HD! The photos are at the bottom of this page.
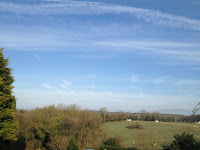 |
| Go for launch |
The first look out the window at 7:00am revealed a decent bit of blue
sky and the conditions were good so we were all systems go.
Our launch strategy delegated balloon filling over to Mark's Dad and brother, while we were based in Launch HQ (which may look suspiciously like a patio table with a laptop on).
 |
| Launch HQ. |
 |
| Balloon with custom made filling device! |
 |
| Payload preparations. |
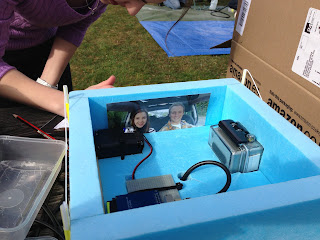 |
| Everything in its place, including a sneaky photo. |
 |
| Nearly time for launch! |
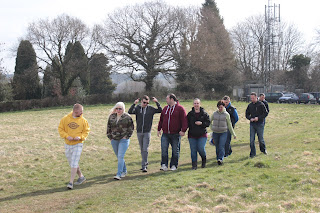 |
| A shady bunch. |
 |
| Cake for the punters. |
 |
| Holding on tight. |
STRATODEAN One launched just before 10.15am from Coleford, Gloucestershire and landed approximately 2.5 hours later, over 100 miles away, in a field outside of Milton Keynes. Our payload, or as one kind gentleman generously referred to it as, our "spacecraft" reached a maximum altitude of 32,127m (105,000 feet) and was tracked by 43 different receivers scattered across the UK and Europe while on its journey. We will follow this post with another detailing some more technical facts and figures.
 |
| Lift off! |
- Many people tracking commented on the strong, clear signal which was great news, therefore we were happy with the quality of our aerial.
- We were pleased with the photos from the Canon camera and that we managed to capture lots of aerial photos of our local area (see album at bottom of page).
- Great launch day atmosphere.
- The ascent and decent rates were as predicted.
 |
| Payload recovered. |
 |
| The tracker and camera still going strong! |
- Despite (and in fact due to) using anti-fog inserts, condensation formed within the GoPro casing, clouding the lens. For future launches, we will consider launching the GoPro without the protective case.
- Now that we have a lot of downward-facing photos, next time we could use two side-mounted cameras.
- Use some black tape around the GoPro-shaped tapered hole in our payload box. Some of the footage taken into direct sunlight had a blue haze due to light reflecting from the polystyrene into the lens.
- We could have packed up our equipment and left the launch site a little quicker to begin the chase.
- Check all cameras (on the ground and up in the air) are set to film at the same frame rate!
- Ideally, we would not have forgotten to attach our contact details and information label onto the box!
- It was noted by some trackers that they were losing the beginnings of our early transmissions. To remedy this, we should remove the 1000ms gap between transmissions.
- The backup tracker did not work at all! Will need to investigate this and decide whether it is worth including next time.
Wednesday, 24 April 2013
Sunday, 21 April 2013
We did it!
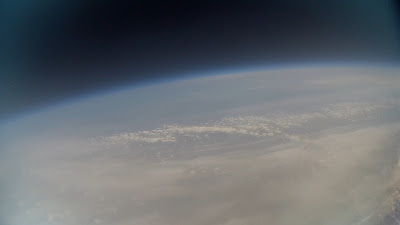
So today we launched and recovered our first ever high altitude balloon with payload! We have hundreds of photos and a few hours of videos to get through and process, but we thought we'd share with you the first few good ones!
Thank you very much to all that came to watch and support the launch and to our families who have helped and supported us so much during planning, launch and recovery. Also thank you to the guys at UKHAS for your help and advice. We had people all over the UK helping us track and even further afield in France, Belgium and Holland!
 |
| Before the Launch! |
 |
| We had some helpers! |
 |
| Our hometown - Coleford, Gloucestershire. |
 |
| Five Acres, Coleford. |
 |
| We made it to the stratosphere! |
 |
| The housing estate we just missed before landing! |
 |
| This is how we found it! |
Saturday, 20 April 2013
Tomorrow is Launch Day
After 6 months of hard work, launch day is nearly upon us! We have spent today doing our final checks, tying parachutes to cord and making sure we are prepared for tomorrow.
Don't forget you can track the progress of the balloon yourself by going to spacenear.us/tracker in the morning. Lift off is 10am. Hopefully everything goes to plan and we get some nice photos and video!
This looks a lot more manageable than last weeks prediction!
 |
| Payload ready for lift off. |
 |
| Tomorrows Flight Prediction |
Sunday, 14 April 2013
The GPS Tracker
When we launch our payload we will need to know exactly where it is in the sky in order to follow and recover it. It is important then, to have a tracker that will give timely and accurate information to us on the ground about where it is and where it's heading. We decided in the early weeks of the project to use a radio based tracker, the kind that most high altitude balloon enthusiasts use, to track our balloon. There were a few reasons for this - it was proven technology, the radio infrastructure existed for balloon tracking and it would be a good challenge in itself to build a GPS tracker - something that we had no experience in before!
At the very start of the project we had no idea of the community and infrastructure that exists to enable balloon launchers to track their payloads as they fly through sky. A full and extensive explanation can he found on the UKHAS Wiki - definitely worth a read to gain a real understanding of what is going on. In a nutshell however:
When you start out on building your tracker you are always pointed to this tutorial, so we shall do the same: ukhas.org.uk/guides:linkingarduinotontx2. This contains everything you need to get you started on sending data over radio using an Arduino and as I found, a nice easy way to get started on C++. We started out with just the NTX2 radio transmitter on a breadboard and wires going to the Arduino.
In very little time we were able to send simple text message strings over the air and decode them at the other end. In the image you can see the Arduino IDE used to program the board on the right and on the left, dl-fldigi the program used to decode the radio signal. Whilst it's not important to know every detail of how radio transmission works, it is important to know the boundaries in which you can operate. Here in the UK we have 433MHz - 434MHz in which to operate radio transmissions without needing a licence. In order to facilitate this easily, the Radiometrix NTX2 that we are using comes in two preset frequences 434.075MHz and 434.650MHz. Both work in the same way but it is important that you know which one you have - there is a handy label on the side!
Once we were happy that we could generate the required RTTY signal using the Arduino and radio transmitter, we then moved on to the second integral part of the tracker - the GPS receiver. Again there is a brilliant guide put together on the UKHAS Wiki page that helped with getting this started: ukhas.org.uk/guides:ublox6. Initially I just soldered some wires into the GPS breakout board and plugged them into the Arduino and hoped everything would work as described, it didn't. The GPS was powering up but we were not getting any data back from the unit. The main reason for this is that this GPS unit with its passive antenna doesn't really work indoors! A quick dash outside with the laptop proved everything was working as expected.
It took a long while and a was a bit of a learning curve to start getting meaningful data back from the GPS. What gave us confidence however was that we were able to use the u-blox u-centre GPS evaluation software almost immediately. Connecting through the Arduino, we could see ourselves plotted on the map and where the satellites were located in the sky - interesting stuff and if you are doing this yourself, definitely download this software!
Once we were happy that the GPS was automatically sending us accurate GPS coordinates and we were able to see these using the Arduino, it was time to try and combine the radio with it. There are a few people who have done this before so using the examples out there really helped get something 'working'. It is not OK though, to just get these examples, program your Arduino with them and hope things will work. It is paramount that you understand exactly what is happening on every line of the code. As well as having a knowledge of how it all works, you will feel much more satisfied! All of our code is available on our GitHub repository. Feel free to use as you wish. It is commented so hopefully should be pretty self explanatory. One thing that did trip us up and worth noting here, was that when using the built-in Software Serial, we were finding that half of the string was getting truncated. This is because of the buffer size in the Software Serial library. Changing this to 128 solved the problem.
We later added the SD card and this also caused problems - especially with RAM. Turns out, simply referencing the SD library causes a whole load of RAM to be used up. I then set about making the code more efficient (encasing all strings in the F() function for example) and using the FreeRam function.
Once we were happy enough that the software was almost there and that the physical connections were correct, it was time to make a more permanent fixture for the components. As we had the Arduino Uno, the simplest solution was to create our own 'Arduino Shield'. This meant that we could 'plug in' our tracker when we wanted to use it and then remove it if we wanted to use the Arduino for something else at a later stage. We bought some prototyping stripboard from Maplin and set about soldering! It was just a case of then plugging it in and hoping for the best. It definitely felt more like a proper device in itself once it was soldered.
Finally you do need an antenna to work with this tracker else no one would hear it! This is is quite simple to achieve with some RG58 coax cable. We followed some examples and advice from the guys on the IRC channel. They said that the most effective and simple antenna is a quarter-wave with ground plane. This is exactly how it sounds - the length of the antenna is a quarter of the length of the whole wave. 434MHz is also known as the 70cm band - so 70cm / 4 = 17cm antenna length. A ground plane is a part of the antenna which help send the signals in a particular direction - in our case towards us on the ground! As mentioned in our Payload Part Two video, we used the coaxial shielding to form the ground plane and the centre coax cable as the main element. It was quite a tedious process to unbraid the shielding - but take your time and you get results.
Finally we created the ground plane by attaching the now divided coaxial shielding to the four corners of the payload box. Our payload is quite big compared to others, so if the ground plane over hangs, then use drinking straws or similar to support it. We have used a few drinking straws inside each other to support the centre element and to keep it straight during flight.
At the very start of the project we had no idea of the community and infrastructure that exists to enable balloon launchers to track their payloads as they fly through sky. A full and extensive explanation can he found on the UKHAS Wiki - definitely worth a read to gain a real understanding of what is going on. In a nutshell however:
- Either via the #highaltitude channel on freenode IRC or the UKHAS Google Group, you let the community know of a future balloon launch. At this point it is important to know what transmitting frequency you will be using and the frequency shift you will be using to distinguish between a binary 0 and 1.
- At the stated day and time, enthusiasts over the country listen out for the radio signal being transmitted from the balloon payload.
- Using their receivers and computer software, they decode the GPS telemetry from the radio signal and upload this information to a central server, which then plots the balloon on the spacenear.us/tracker for the whole Internet to see.
- This has been going on for a few years!
Components and code
There are two main parts to it, the Arduino Uno prefabricated board at the bottom and our arrangement of components soldered onto stripboard fitted on top. On the left of the board with the black blob antenna is the GPS receiver, the silver box is the radio transmitter with its additional SMA antenna connector, the flat component in the middle is an SD card reader and finally 6 AA Energizer Lithium batteries on the right to power it all. There are various LEDs and resistors also needed to complete the circuit - see the Wiki links below. It took a good few months to go from initial research to a fully working tracker! The computer (Arduino) needs to be programmed in order to get things working, you aren't able to just plug things in an expect it to work. The program works as follows:- Arduino is initially powered up and does a check of all components to ensure that it can use them.
- It asks the GPS for location information - it returns lots of information including latitude, longitude, altitude and number of satellites it can see in a text format known as NMEA.
- The program extracts the useful bits of data that we need and puts it into a text format that UKHAS is expecting.
- The text string has a mathematical calculation performed on it, known as a checksum. This works out a four character sequence that must be added to the end of our string. When our string is received by the UKHAS listeners, their computer will do the same calculation - if the four characters match then they can be sure that the data they have received is how it was originally transmitted by the tracker.
- The whole string is then divided into its individual characters and the binary version of each character is sent over RTTY radio transmission by alternating the frequency about a particular wavelength (434MHz - unlicensed and free to use in the UK). This alternating creates the binary code for the string which is then decoded by the receivers.
- Saves a record of the text onto the SD card to act as a 'black box flight recorder'.
- Repeat steps 2 - 6 until the battery runs out!
 |
| Our GPS Tracker |
 |
| Initial prototyping |
 |
| First radio transmissions |
 |
| Prototyping GPS |
It took a long while and a was a bit of a learning curve to start getting meaningful data back from the GPS. What gave us confidence however was that we were able to use the u-blox u-centre GPS evaluation software almost immediately. Connecting through the Arduino, we could see ourselves plotted on the map and where the satellites were located in the sky - interesting stuff and if you are doing this yourself, definitely download this software!
 |
| The radio and GPS on the same breadboard for the first time |
We later added the SD card and this also caused problems - especially with RAM. Turns out, simply referencing the SD library causes a whole load of RAM to be used up. I then set about making the code more efficient (encasing all strings in the F() function for example) and using the FreeRam function.
Final solution
 |
| Underside |
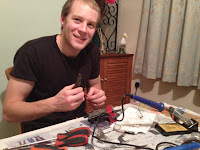 |
| Mark's brother Graham helping with the soldering! |
 |
| Coaxial shielding removed |
 |
| Antenna attached to payload |
What we would improve
Although this tracker has yet to fly - there are already a few things that we would change or improve on the next version. The first is to use a different Arduino board. The Uno is a great prototyping board, but it requires 7v-12v power input so it can run at 5v. This means that we need to use 6AA (6x1.5v = 9v) batteries which are pretty heavy! Following on from this, we would possibly investigate fabricating our own DIY printed circuit board and solder components together with the Arduino chip directly together.Hope this has helped
Although we haven't gone into the deep technical code and electrical side of things here, we hope this overview will show you the general processes needed in order to create your own High Altitude Balloon tracker. We hope to fly this very soon! If you have any questions please email stratodean@gmail.com or talk to the guys on the IRC channel. If you found this post useful or feel inspired to start your own project do let us know via email or Twitter - we'd love to hear from you!
Subscribe to:
Posts (Atom)


